Battle of Châu Ðinh
This article is incomplete because it is pending further input from participants, or it is a work-in-progress by one author. Please comment on this article's talk page to share your input, comments and questions. Note: To contribute to this article, you may need to seek help from the author(s) of this page. |

The Battle of Châu Ðinh was a battle fought during the Sóc Quang Campaign of the Ai Chi War; it was fought between the Imperial Vionna-Frankenlischan Expeditionary Corps and the Aichian defenders of Fort Ngọc Cường, near the Châu Ðinh forest.
Although the Vionnan-Frankenlischan forces managed to gain the upper hand in advancing the fort strategically, the Aichians managed to repulse their attack by inflicting more casualties towards the former, mostly due to the tactical exploitations they have discovered and obtained; one prominent exploitation was of the colored uniforms worn by the Expeditionary Corps, which lead them to change their standard uniforms to desert khakis, so to reduce the rate of detection.
Background
The Imperial forces made up a total of 40,000 troops: 35,000 Infantry, 5,000 Cavalry plus Engineers, Artillery (amounting to 112 pieces in total), medical and supply staff along with army followers and staff officers.
A fortified redoubt at Chau Dinh stood in the path of the Imperial Expeditionary Force which was marching towards Fort Ngọc Cường. Scouts woefully underestimated enemy strengths and defending artillery, which lead Lieutenant General Lindegard to order an unprepared attack so as to preserve as much time as possible.
Major General Walter Brice, the Earl of Brice, was opposed to such an unprepared approach and was the only one of the three Imperial commanders to fully deploy his artillery, in this case, a battery of Field Howitzers. Brice, as commander of the Second Column, was at a disadvantage as his force numbered just under a quarter of the strength of the entire Imperial Expeditionary Corps.
Preperation
Major General Brice set up his Royal Briceport Artillery, a battery of Field Howitzers, behind a group of rocks to provide natural cover while the short barrelled, high trajectory howitzers could easily fire over them and hit the enemy positions. His light cavalry, a group of 800 mercenaries from the Wolfswood Imperium, dismounted and scouted ahead the Aichian positions reporting few outdated artillery pieces and, mistaking the numbers that Aichian battle standards denominated, reported a force of just under 40% of the actual Aichian strength.
Armed with this knowledge, Lieutenant General Lindegard gave only half an hour to make preparations to attack meaning that the First Column only deployed the Royal Matlock Artillery, a battery of outdated Field Guns, the Third Column deployed none of their artillery and there were not enough scaling ladders for the assault against the redoubt itself.
Order of Battle
First Column - Lieutenant General Sir Horace Lindegard
- 1st Royal Monton Fusiliers Heavy Infantry
- 2nd Royal Monton Fusiliers Heavy Infantry
- 1st Royal Monton Rifles Rifle Infantry
- 2nd Royal Monton Rifles Rifle Infantry
- 3rd Royal Monton Rifles Rifle Infantry
- 1st Royal Matlock Rifles Rifle Infantry
- 1st Stamford Rifles Rifle Infantry
- 1st Windermere Rifles Rifle Infantry
- 2nd Windermere Rifles Rifle Infantry
- 1st Light Wingston Foot Light Infantry
- 1st Light Harmstead Rifles Light Infantry
- 1st Lundy Dragoons Dragoons
- Royal Haran Dragoon Guards Dragoon Guards
- Royal Quilman Lancers Lancers
- Royal Monton Artilery Field Guns
- Royal Matlock Artillery Field Guns
- Royal Windermere Artillery Howitzers
Second Column - Major General Lord Walter Brice, Earl of Brice
- 1st Royal Briceport Rifles Rifle Infantry
- 2nd Royal Briceport Rifles Rifle Infantry
- 1st Glanchester Rifles Rifle Infantry
- 1st Royal Wakefield Rifles Rifle Infantry
- 2nd Royal Wakefield Rifles Rifle Infantry
- Royal Dunwich Light Rifles Light Infantry
- House Brice Family Retainers Noble Retainers
- Wolfswood Mercenary Cavalry Light Cavalry
- Royal Briceport Artillery Field Howitzers
Third Column - Lieutenant General Din Chao
- 1st Sepoy Rifles Rifle Infantry
- 2nd Sepoy Rifles Rifle Infantry
- 3rd Sepoy Rifles Rifle Infantry
- 4th Sepoy Rifles Rifle Infantry
- 5th Sepoy Rifles Rifle Infantry
- 6th Sepoy Rifles Rifle Infantry
- 7th Sepoy Rifles Rifle Infantry
- 8th Sepoy Rifles Rifle Infantry
- 9th Sepoy Rifles Rifle Infantry
- 10th Sepoy Rifles Rifle Infantry
- 1st Sepoy Light Infantry Light Infantry
- 2nd Sepoy Light Infantry Light Infantry
 3rd Son Tre Infantry Volunteer Regiment Rifle Infantry
- 5th Lâm Thuận Volunteer Regiment of Voltigeurs Light Infantry
- Imperial Sepoy Light Cavalry Light Cavalry
- 4th Lâm Thuận Horse Cavalry Regiment Light Cavalry
- 1st Imperial Sepoy Artillery Field Guns
- 2nd Imperial Sepoy Artillery Field Guns
- 3rd Imperial Sepoy Artillery Field Guns
Commanders
- HoraceLindegard.jpg
Lt. Gen. Horace Lindegard
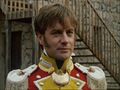
Maj. Gen. Lord Walter Brice
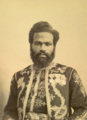
Lt. Gen. Din Chao

