Second Battle of Seleucia
This article is incomplete because it is pending further input from participants, or it is a work-in-progress by one author. Please comment on this article's talk page to share your input, comments and questions. Note: To contribute to this article, you may need to seek help from the author(s) of this page. |
The Second Battle of Seleucia, also known as the Second Battle of Saluqia, was a major battle during the Middle East Campaign. Revolving around the city of Seleucia and the nearby northern town of Nasirilah, the Commonwealth forces were determined to evict the Quenminese out of the Middle East after their victories during Operation Anicetus. The battle ended in a decisive Allied victory after fifteen days of heavy fighting.
The result of the battle proved to be a significant event that convinced the Quenminese commanders to commence a retreat eastward onto Afghania. Furthermore, the battle permanently shattered Quenminese presence in the Middle East. Alongside, the resulting engagements inflicted moderate to severe damage to the ancient ruins, which will be restored by the conflict's end.
Background
Order of Battle
Course of the Battle
Opening Moves: 28-31 December 1941
Breakthrough towards Western Seleucia: 1 January 1942
- Allied troops managed to breakthrough the Quenminese defense lines and push them back towards one part of the city: Seleucia Superior.
Fighting in the Baijibil and Al-Suqarah Districts: 1-7 January
Engagement in the Grand Agora: 5-6 January
A key engagement that led to the Imperial retreat to the Acropolis.
Battle of Nasirilah: 2-17 January
Yarzar and Testarossa held out in Nasirilah, a town north of Seleucia, where they were met with elements of the Quenminese 22nd Army led by Vương Thị Lệ and East Europan 12th SS Panzergrenadier Division Seleucus Megas (1st Mesopotamian) led by Alfred Toht Kiesling.
Siege of the Acropolis: 10-17 January
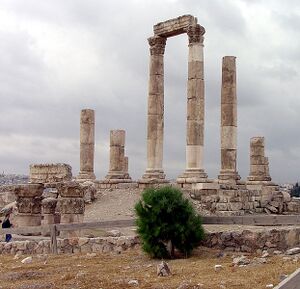
What came along subsequently was the siege of Seleucia's acropolis which contained the ruins of the Palace of the Basileus and the Temples of Athena, Zeus, and the Seleucids. This part of the ruins contained the official headquarters of Marshal Chiến.
Six attacks have been committed. Khoi and Guldenstadt commit a night raid that caught the Allies by surprise.
A spearhead thrust was dispatched by Gen. Brian Regnitz in the form of the Kreuzen Highlanders supported by the Royal Guards led by Naing Thuta Maung broke through the Quenminese defense lines via the Hodos Basileudon. At that point, the Quenminese had no choice but to retreat from the acropolis and towards the eastern edge of the ruins and at the end of the bridge running along the Hodos Athena.
The siege constitutes of the bloodiest engagements of the Battle.
Battle of the Al Suqarimah and Dirirmah Districts: 8-17 January
Battles occurred alongside the Siege of the Acropolis, which will open the way for the Push Toward the Tigris.
Flanking Manuever from Nasirilah by General Yarzar: 17 January
At Arkar's request, Yarzar moved forward from the north.
This maneuver significantly bogged down hopes for the Quenminese-Archadian defense line to hold longer and any attempts to launch a counter-offensive into the Allied lines.
Push Toward the Tigris: 18 January

- Fought along the Hodos Athena and the Tigris River.
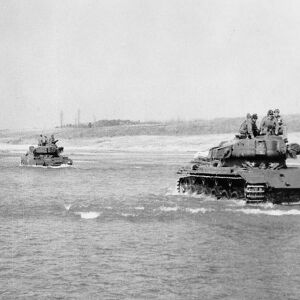
Amphibious landing using crafted rowboats and the leftovers of the Rubrumian landing crafts to push the Quenminese and Archadians back to their last bastion: Seleucia Inferior. The crossing sectors were equally divided among the participating forces. They were given code names, namely Tom, Dick, and Harry in order to prevent the enemy from expecting enemy attacks.
Dick Sector
Tom Sector
Harry Sector
The Commonwealth forces crossed about the same time as the Bethausian forces crossed. The attack was spearheaded by the Lucis Army's new tank, the Centurion tank. They arrived just 5 days before the river crossing and were needed by Sugiyama to replace some tanks lost during the previous days of the battle. During the crossing, 2 Centurions were damaged but were repaired afterwards and was able to cross the river without a single loss of life. On the other side, the Quenminese forces were shocked to first see the Centurion in a tank-on-tank combat. Anti-tank units were dispatched but were not able to destroy the Centurions, prompting Commonwealth infantry to continue advancing and covering the tanks.
Battle of Eastern Seleucia: 20-25 January
The Terrace Gambit: Battle of Tall-Qunbar District, 21-24 January

- There is a holdout at the Aristobulic Terrace, which is a key location in the District
- There is an engagement within the ruins
- There is a battle at the Southern public baths.
- There is a battle at the Temple of Apollo
- There is a battle at the Southern Amphitheater
- Heavy tanks sent by Chien, but were destroyed
- Arkar sends a combined force of Karens and Tarhaajas in to occupy the ammunition dump.
